

 833-264-6620


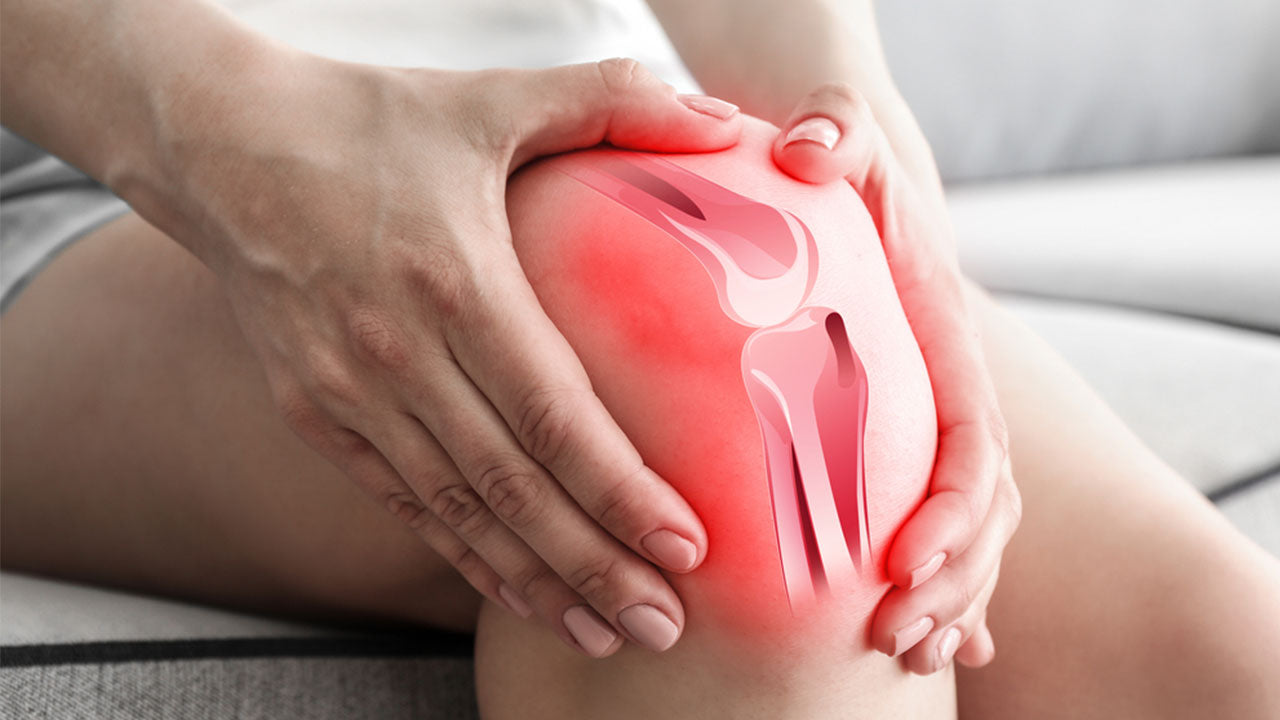
If you've ever dealt with a pinched nerve in your hip, you know how painful, frustrating, and downright depressing it can be. But the good news is that there are a number of effective techniques available that can help you take care of the condition right in the comfort of your own home. So come with us as we discuss what causes a pinched nerve in the hip and what you can do to treat the pain you're having now and prevent it from coming back later.
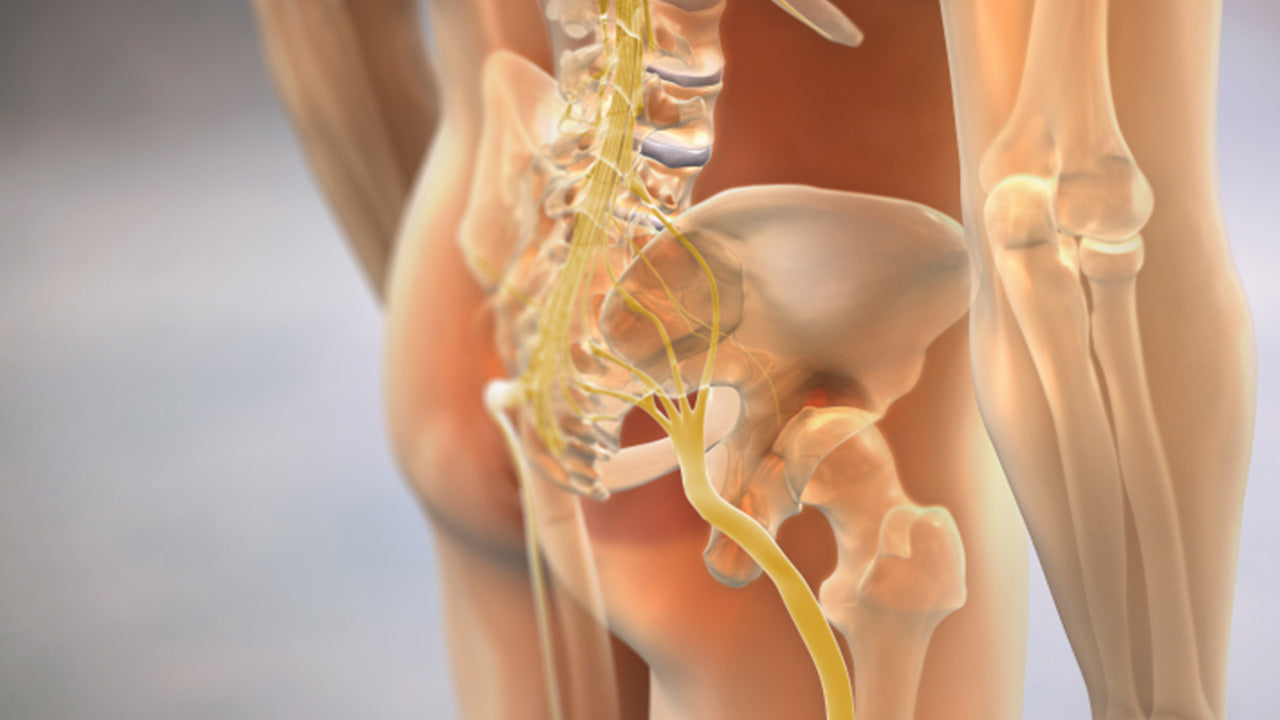
Whether it's your back, neck, hip, or hand, if too much pressure is applied to a nerve, its normal function is disrupted and the nerve is said to be pinched.
How does a nerve become pinched?
It depends on where in the body the problem occurs.
For example, a herniated disc can pinch a nerve when the bone or cartilage of the spine comes in contact with the nerve root. By contrast, a pinched nerve resulting from carpal tunnel syndrome may be caused by a nearby tendon sheath, bone, or ligament rubbing against or pressing on the nerve.
A similar process can occur in or around the hip.
When a nerve is pinched, pressed on, or otherwise irritated by the surrounding bone or soft tissue, a number of unpleasant symptoms may result. Common symptoms you may notice include:
Regardless of where it occurs, a pinched nerve doesn't just happen. Something needs to trigger it. Risk factors for developing a pinched nerve in the hip include:

Most cases of pinched nerves resolve quickly and leave no lasting damage. However, if the root cause of the nerve compression isn't resolved, permanent nerve damage and chronic pain may result.
So if you're experiencing symptoms of a pinched nerve that don't respond fairly quickly to conservative treatment, you should see your health care provider. After performing a physical examination and speaking with you about your symptoms, they may recommend diagnostic testing. This may include:
Unless you've suffered a serious injury or have a disc injury that's threatening permanent damage to your spinal cord, the good news is that all but the most severe cases of pinched nerves can be successfully treated at home using conservative treatment options. These may include:

Because a pinched nerve in the hip is often caused by irritation from the surrounding soft tissues, exercises that gently stretch the muscles and tendons can be a great way to take pressure off the nerve.
However, it's important to remember that the operative term here is gentle—aggressive stretching or vigorous exercise will only exacerbate the problem. With that in mind, we now offer these seven exercises proven to help treat and prevent the pain of a pinched nerve in the hip.
But, as always, if you have a medical condition that may affect your ability to safely perform any of these exercises, or if you simply need more guidance, be sure to speak with a health professional before proceeding.
A common cause of nerve pain in the hip is piriformis syndrome—a painful condition that's grown in tandem with the prevalence of sedentary lifestyles. In piriformis syndrome, a tight piriformis muscle rubs against the sciatic nerve, causing hip pain and symptoms of sciatica.
However, it's relatively easy to stretch the piriformis—and there are a number of ways to go about it.
The following version of the piriformis stretch can be performed on the floor or even your bed. Just follow these guidelines:
A variation of the piriformis stretch called the lying crossover stretch can be performed by following these guidelines:
A third variation of the piriformis stretch is performed sitting up. To try this version, simply follow these guidelines:
You can also stretch your piriformis while seated in a chair. Although you may not think a seated stretch would be very effective, it actually works quite well for the piriformis—and it can be performed just about anywhere. To perform this stretch, follow these guidelines.
Another muscle that's commonly implicated in hip pain is the iliopsoas. This muscle functions as the body's main hip flexor, but when we sit for any length of time, it becomes shortened and tight. To stretch the iliopsoas muscle, follow these guidelines:
When the gluteal muscles and muscles of the outer hip are tight, they can cause hip and low back pain. By stretching these muscles, you can relieve the tightness that contributes to pinched nerves.
An outer hip and gluteal stretch can be performed either lying or standing. To perform the floor version, simply follow these instructions:
For the standing version of the outer hip and gluteal stretch, follow these guidelines:
It may sound like a dental procedure, but nerve flossing is a specific set of movements that helps free entrapped nerves by causing them to glide back and forth through the tissues impinging on them. In other words, the nerve acts like a piece of dental floss sliding between your teeth.
Nerve flossing can be performed a number of different ways, so let's cover a couple of them.
The first technique can be performed using these guidelines:
You can also perform nerve flossing using this technique:
Another version of nerve flossing is called the cat camel stretch. Unlike the previous techniques, which focus on the whole body, the goal of the cat camel stretch is to increase flexibility in the spine, especially the lower back.
To perform the cat camel stretch, simply follow these guidelines:
A simple exercise to improve the mobility of your lower back and relieve symptoms of sciatica is the McKenzie press-up. To perform this exercise, follow these instructions:
The bird dog stretch is a deceptively simple stretch that helps strengthen the so-called posterior chain—the muscles that run along the back of the body.
To perform this stretch, follow these guidelines:
If you're prone to pinched nerves, you might also want to look into learning a little something about self-applied trigger point massage.
What is trigger point massage, you ask?
Many of the same risk factors that predispose an individual to a pinched nerve can also predispose someone to developing myofascial trigger points—small, tightly contracted knots within a muscle.
These tiny areas are known as trigger points because circulation to them is restricted, cutting off the flow of oxygen and vital nutrients. This, in turn, leads to referred pain, which may affect both muscles and joints.
Over time, trigger points can affect the function of the muscles around them, which can lead to symptoms of a pinched nerve.
While trigger point massage is relatively easy to do—and makes a great companion to all of the exercises listed above—there is a small learning curve. Therefore, if you're interested in this proven pain relief technique, we recommend picking up a copy of the excellent reference guide the Trigger Point Therapy Workbook by Clair Davies.
By following the above techniques, signs and symptoms of a pinched nerve should begin to disappear within a few days. However, if pain is severe or doesn't improve, don't hesitate to speak with a qualified health care professional about further treatment.


Be the first to know about new craveable recipes and tips for living your best life.

Pain on the inner side of the knee could be as mild as a sprain or serious enough to require surgical intervention. Find out what could be causing inner-side knee pain and what your treatment options may look like.
Sign up for our newsletter and let us know what you’re interested in, and you’ll also receive a free E-Book.
30 years of research... and still going.
Give us a try today.
If, for any reason, you don’t like us or our products, simply contact our support team within 60 days and we’ll happily refund you 100% of your payment.
It's our way of making sure you're completely happy with your purchase.